


Last Updated: October 23, 2026
Quick Summary
Your nail polish peel happens because of adhesion failure: oil, moisture, or residue sits between the polish and the nail plate, so the coating lets go. Surface residue, application errors like flooding the cuticle or stacking thick layers, and nail flexibility that cracks rigid polish are the three most common causes.
- Swipe each nail with rubbing alcohol on a lint-free pad right before you polish and let it dry fully.
- Flooding the cuticle is the number one application error we see, so leave a hairline gap at the cuticle.
- Wait about two to three minutes between thin regular polish coats, and until each layer is touch-dry.
- Capping the free edge with top coat seals the polish edge so water can't sneak in and start a lift.
- Never peel lifting polish off by hand, because it strips the top layers of the nail plate.
Table of Contents
- Why Does My Nail Polish Peel? The Real Causes
- Regular Polish vs. Gel Polish: A Peeling Diagnostic
- How to Prep Nails for Nail Polish So It Stays Put
- How to Stop Nail Polish From Peeling: Step-by-Step Routine
- How Long to Wait Between Nail Polish Coats?
- Does Base Coat Prevent Nail Polish From Peeling?
- Fixing Peeling Without Damaging Natural Nails
- Conclusion
- Frequently Asked Questions
Why Does My Nail Polish Peel? The Real Causes
If you've ever watched a fresh manicure lift at the edges within a day, you've asked the question we hear constantly at Solar Magic Nail Polish: why does my nail polish peel? The answer almost always comes down to adhesion. Polish needs a dry, clean, slightly textured surface to grip.
Think of it like paint on a wall. Paint sticks to a prepped surface. It slides off a greasy one.
Three things break adhesion most often:
- Surface residue from natural oils, lotion, or soap
- Application errors like flooding the cuticle or stacking thick layers
- Nail flexibility that cracks rigid polish as the nail bends
Below, we'll show you exactly how to diagnose which one is happening to you and fix it for good.
Nail Prep and Surface Residue
The nail plate is porous and naturally coated in oils. Those oils are great for nail health and terrible for polish grip. A common mistake is skipping the final wipe-down because nails "look clean." They aren't. Even a trace of hand lotion or cuticle oil creates a slick layer that stops the base coat from bonding.
The fix is simple: swipe each nail with rubbing alcohol on a lint-free pad right before you polish. Let it dry fully. Don't touch your nails afterward, since your fingertips carry oil too.
Application Mistakes That Cause Lifting
Flooding the cuticle is the number one application error we see. When polish touches the skin around the nail, it dries into a lip. As that lip lifts, it pulls the whole coating up with it.
Other frequent culprits:
- Thick layers that stay wet underneath while the top skins over
- Skipping the base coat and painting straight onto bare nails
- Rushing coats before the previous one sets
- Uneven curing on gel systems from a weak or dirty lamp
Thin coats, applied in two or three passes, beat one heavy coat every time.
Regular Polish vs. Gel Polish: A Peeling Diagnostic
Regular polish and gel polish fail for different reasons, so the fix depends on which product is on your nails. Before you change your routine, identify what you are wearing and how it is failing.
| Product | What You See | Likely Cause | First Fix to Try |
|---|---|---|---|
| Regular polish | Chips at the tip within 24 hours | Free edge not capped, or tip flexed before polish set | Cap the tip with top coat and extend dry time |
| Regular polish | Lifting near the cuticle | Polish flooded onto skin or oil residue on the plate | Clean the plate with alcohol, leave a hairline gap at the cuticle |
| Regular polish | Cracks across the nail | Layers applied too thick, solvent trapped underneath | Switch to two or three thin coats |
| Regular polish | Peels in a sheet after a few days | Base coat skipped or incompatible with color | Use a base coat formulated for regular polish |
| Gel polish | Whole sheet lifts in one piece | Under-curing or moisture on the nail plate | Check lamp bulbs, dry nails fully before base |
| Gel polish | Lifting at the sides after a week | Base coat applied too thick or not cured evenly | Apply base thin and cure all five fingers fully |
| Gel polish | Peeling with a thin layer of nail attached | Over-filing or removal damage before application | Pause gel, let the nail plate recover |
| Gel polish | Chips at the tip | Free edge not sealed or capped | Cap the free edge with top coat before curing |
Use the table as a starting point, not a diagnosis. If two rows fit, fix the preparation step first, because prep errors cause most peeling in both systems. If the same symptom returns after two full applications with corrected prep, the problem is likely the product or the lamp rather than your technique.
If you want to explore finishes that hold up through daily wear, you can shop color-changing nail polish built for longer wear.
How to Prep Nails for Nail Polish So It Stays Put
Good prep is the difference between a two-day manicure and a two-week one. Here's the routine we recommend.
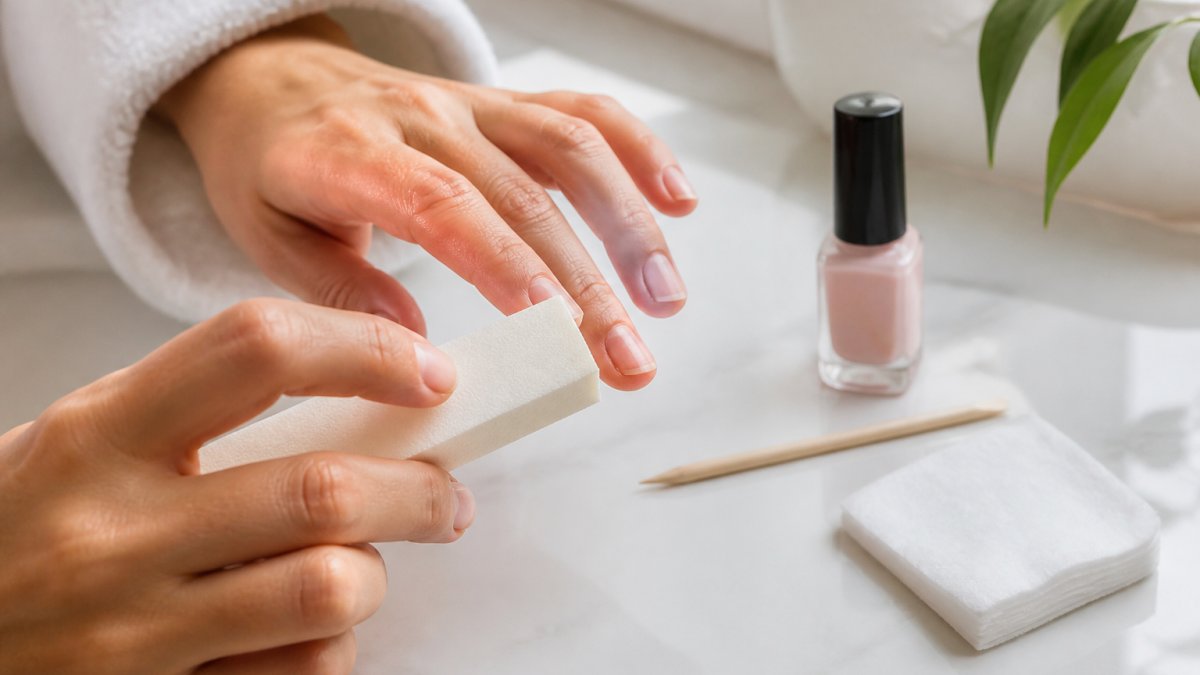
- Remove old polish completely, including any base coat film.
- File the free edge in one direction to smooth the tip.
- Gently buff the nail surface to remove shine and add grip. Don't overdo it.
- Push back cuticles with a stick, without cutting the skin.
- Wipe with rubbing alcohol and let the nail plate dry.
- Avoid lotion or oil until the manicure is fully set.
Skipping step five is where most people lose their manicure before it starts.
How to Stop Nail Polish From Peeling: Step-by-Step Routine
This is the application order that keeps polish on through dishes, typing, and everything else. Follow it coat by coat.
- Base coat: one thin layer, let it dry tacky.
- First color coat: thin, starting mid-nail and pushing toward the tip.
- Second color coat: same thin pass for even color.
- Top coat: seal everything, including the tip.
- Full dry time: give it the time it needs before you use your hands.
A gel-effect top coat makes a real difference here. You can browse gel-effect top coats that add a hard, glossy seal over any color. You can browse gel-effect top coats that add a hard, glossy seal over any color.
Capping the Free Edge
Capping means running the top coat along the very tip of the nail, wrapping it slightly under the edge. It seals the polish edge so water can't sneak in and start a lift. This one step adds days to a manicure, and it takes seconds per nail.
A clear top coat works best for capping because it won't show wear. You can shop clear top coats made to seal and protect the whole manicure. You can shop clear top coats made to seal and protect the whole manicure.
How Long to Wait Between Nail Polish Coats?
Wait about two to three minutes between thin regular polish coats, and until each layer is touch-dry before adding the next. That timing is a starting point, not a rule, because the real test is whether the layer below has stopped moving under the next brush stroke. Rushing this step traps solvent under the surface, which leads to smudging and early peeling.
The mechanism matters. Regular polish dries by evaporation, and the solvent has to escape through the layers above it. If you add a second coat while the first is still wet underneath, the top skins over and seals the solvent in.
A practical sequence for regular polish:
- Base coat: apply thin, wait until it feels tacky but does not transfer to a light touch, usually one to two minutes.
- First color coat: apply thin, wait two to three minutes until touch-dry.
- Second color coat: same thin pass, same wait.
- Top coat: seal the whole nail and cap the tip, then give the full manicure 30 to 60 minutes before normal hand use and several hours before washing dishes or showering.
Gel polish is different. Each layer must be fully cured under the lamp before the next goes on, and the cure time is set by the lamp and product instructions, not by feel.
A simple rule: if the surface still feels cool or wet to a light touch, wait longer. Patience here is cheaper than a redo.
Does Base Coat Prevent Nail Polish From Peeling?
Yes, a base coat is one of the best defenses against peeling. It creates a bonding layer between the nail plate and the color, smooths the surface, and helps polish flex with the nail instead of cracking off. It won't rescue a greasy nail plate, though. Prep still comes first.
If peeling is your main problem, a base coat plus a good top coat is the combo that matters most. You can explore color-changing top coats that add protection and a shifting finish in one step.
Fixing Peeling Without Damaging Natural Nails
The instinct is to pick and peel a lifting manicure. Don't. Peeling polish off by hand strips the top layers of the nail plate and leaves nails thin and weak, which makes the next manicure peel even faster.
Instead:
- Soak the nail in warm soapy water to soften the polish.
- Use remover made for your polish type, not harsh scraping.
- Never buff away a stubborn patch on a thin nail.
- Give nails a rest between gel sets to recover.
If you're refreshing a peeling manicure, a top coat collection lets you reseal and extend wear without a harsh full removal. You can shop top coat collections for that quick refresh.
Conclusion
Peeling polish is almost never bad luck. It's oil, thick layers, flooded cuticles, or a rushed dry. Fix your prep, keep coats thin, cap the free edge, and your manicure will hold far longer.
That's exactly what we build for at Solar Magic Nail Polish. Our 21-free, vegan, cruelty-free formula delivers a super strong, chip-resistant finish with a salon-quality look.
Ready to make your polish last? Get started with Solar Magic Nail Polish and give your next manicure the wear it deserves.
Frequently Asked Questions
How do I make my nail polish stop peeling?
Start with a clean, dry nail plate: wipe each nail with rubbing alcohol, push back cuticles, and skip hand lotion right before painting. Apply thin coats rather than thick layers, cap the free edge, and let each coat dry for about two minutes before the next. A base coat and top coat add adhesion and seal the finish. If your nails flex a lot, a flexible top coat helps prevent the one-piece peel that happens when polish is harder than the nail underneath.
Is peeling off nail polish bad for your nails?
Yes. Peeling polish off by hand strips layers of the nail plate and can leave nails dehydrated, thin, and prone to splitting. It also removes the surface that new polish needs to grip, which makes the next manicure peel faster. Remove polish properly with an acetone or non-acetone remover, soak a cotton pad, hold it on the nail for a few seconds, and wipe gently. If a chip is lifting, file the edge smooth rather than picking at it.
Does a base coat help prevent nail polish from peeling?
A base coat does help, but only when it matches your nail type and is applied to a clean surface. It creates a bonding layer between the natural nail and color, smooths ridges, and blocks staining. On oily nails, a base coat alone may not be enough, so prep with rubbing alcohol first. Skipping base coat often leads to lifting at the cuticle line within a day or two, especially with regular lacquer.
How long should regular nail polish dry between coats?
Wait about two minutes between thin coats of regular polish. Thick coats need far longer and often stay soft underneath, which causes smudging and early peeling. After the final color coat, wait two to three minutes before top coat, then give the whole manicure 15 to 20 minutes to set before doing dishes or typing. Quick-dry drops can shorten surface drying, but they do not replace proper coat timing.
